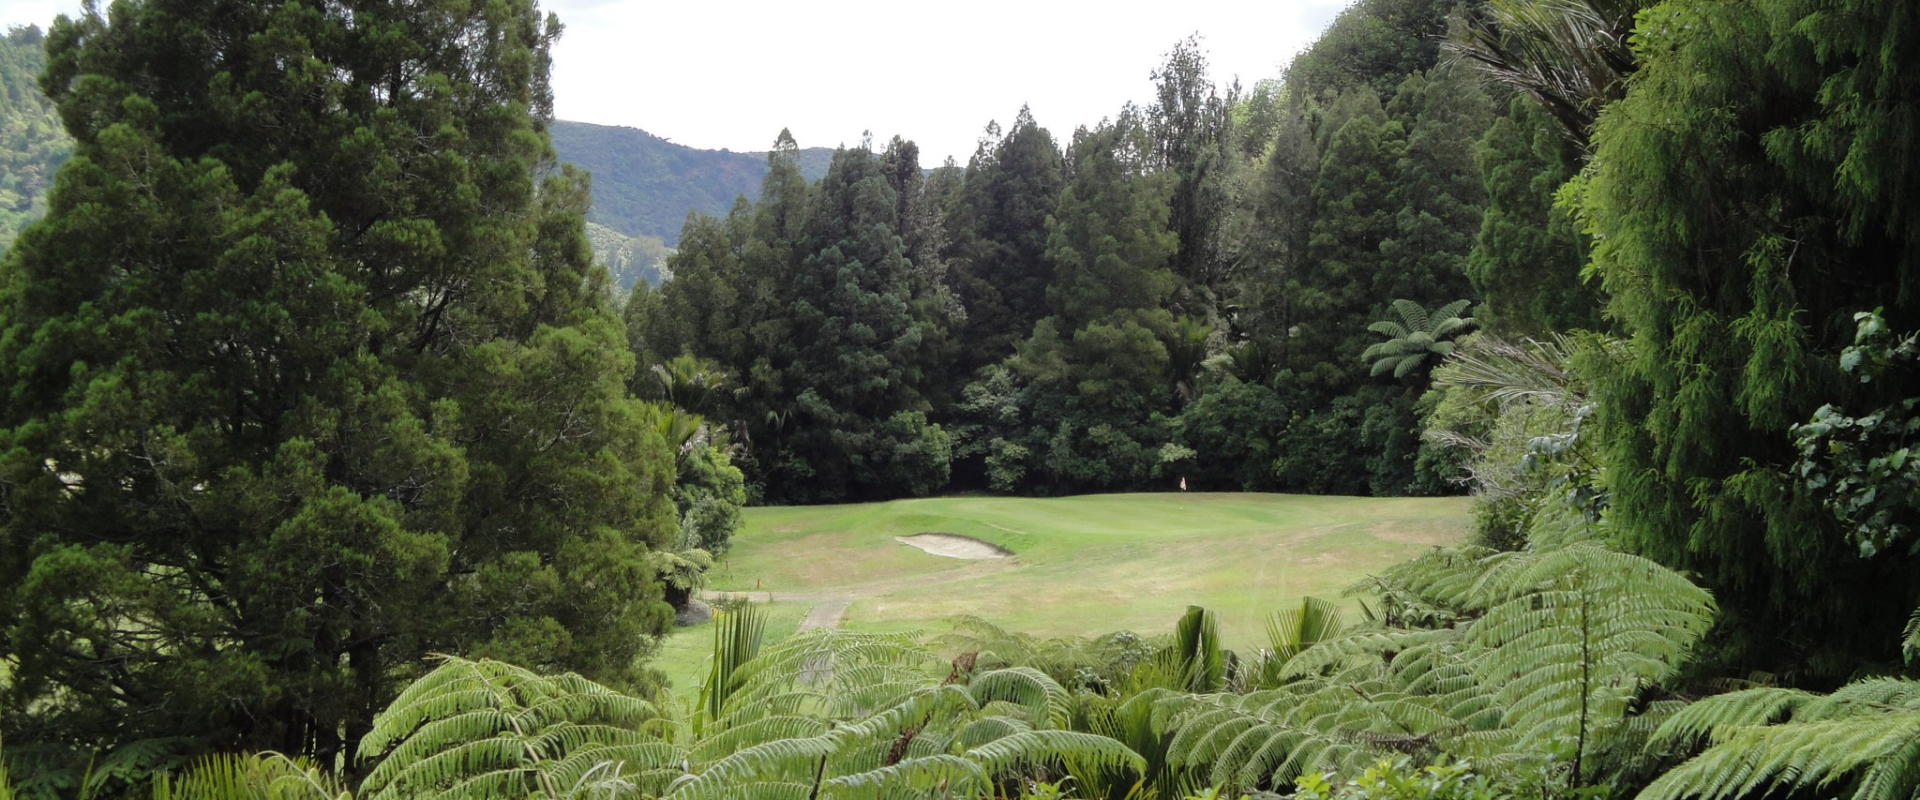
Waitakere Golf Club is hidden in a small corner of the Cascade Kauri Park, 30 minutes drive from Auckland Central City.
We have a very special 18 hole golf course with 4 par 5’s and a stunning 6th hole where you tee off in the bush. No two holes are similar and the course offers a wonderful experience for golfers of all abilities.
HOLE 1 (Par 4)
Elevation | 376 M | Stroke 7
This is a straight forward downhill par 4 to start your round.
It's unique feature is a drop of over 50m from tee to green.
You tee off to a plateaued fairway where you then have a second shot to a green sitting below you the danger is long with a lateral penalty areas behind the green.
HOLE 2 (Par 4)
Bamboos | 342 M | Stroke 1
The second hole is an uphill par 4 with a dog leg to the left. While not a long hole it requires respect as it is the number one shot hole.
The tee shot must be accurate as lateral penalty area guards the left hand side of the fairway & out of bounds to the right.
The green slopes from back to front and the left front is guarded by two large trees.
HOLE 3 (Par 5)
Cascades | 509 M | Stroke 5
This is a par 5 that requires accuracy from tee to green.
At 482m it is reachable in two by the big hitters but requires three good shots from the average golfer.
The elevated green slopes from back to front and it pays not to be above the hole with your approach shot.
HOLE 4 (Par 3)
Plateau | 143 M | Stroke 9
Teeing off a plateau to an elevated green you need accuracy off the tee.
The green is protected by a bunker in the front and anything that misses the green requires a good chip & putt to make par.
HOLE 5 (Par 5)
Puriris | 446 M | Stroke 3
A straight forward uphill par 5.
While not long at 446m the green is protected by a large tree 50m short of the green making it difficult to reach in two & get close for your third.
The green is surrounded by lateral penalty area and any shot that is short will feed back towards you.
HOLE 6 (Par 3)
Dress Circle | 126 M | Stroke 15
Waitakere Golf Club's signature hole.
You tee off from an Astroturf mat in the bush to a green which is slanted from front to back.
Your tee shot needs to be accurate as the green is guarded by bunkers short & right.
The green is then surrounded on three sides by lateral penalty areas.
HOLE 7 (Par 5)
Grandstand | 458 M | Stroke 17
This is a straight forward downhill par 5.
Reachable in two but requires accuracy off the tee as the prevailing winds push your ball to the out of bounds which runs the length of the fairway on the right hand side.
The green slopes from front to back and is hard to hold in the summer.
HOLE 8 (Par 3)
The Ranger | 155 M | Stroke 13
The longest par 3 on the course measuring 155m.
A straight forward hole with a bunker guarding the front left.
The green is slightly elevated meaning any tee shot missing the green leaves a difficult chip to make par.
HOLE 9 (Par 4)
Everest | 265 M | Stroke 11
A short par 4 that has a sharp dog-leg to the right & also includes a major increase in elevation to one of the smaller greens on the course.
Accuracy off the tee is required as you drive through a narrowing gap in the trees to an undulating fairway. Out of bounds runs the length of the hole on the right hand side.
HOLE 10 (Par 4)
The Donga | 303 M | Stroke 10
A shorter par 4 where you tee off through a gap in the trees to a plateau fairway.
Your approach shot to the green requires accuracy as there is a large tree guarding the left hand side and rough behind and to the right. The green is some 25m below the fairway & it pays to walk forward to have a look.
HOLE 11 (Par 3)
Perusal | 105 M | Stroke 16
A short par 3 of just 105m.
While only a short iron off the tee the green is guarded by a large tree in front.
The green narrows at the back and anything left is bogey material.
HOLE 12 (Par 4)
Lost Horizon | 300 M | Stroke 8
The 12th hole is a shorter par 4 that dog-legs to the left.
It's fairway is split giving you two options off the tee. If staying on the upper level, your second shot is to a green below you.
If you find yourself on the lower section you are hitting to an elevated green which slopes from front to back.
HOLE 13 (Par 5)
Safari | 381 M | Stroke 14
A short par 5 that dog-legs slightly to the right.
There is an internal out of bounds to the right and a lateral penalty area to the left.
The fairway is undulating with an elevated green.
Don't be short!
HOLE 14 (Par 3)
The Glades | 112 M | Stroke 18
A straightforward par 3 where you tee off a mat in the bush.
Ranked the easiest hole on the course it's only difficulty is in front where any tee shot making the green comes back to meet you.
HOLE 15 (Par 4)
Bluegums | 320 M | Stroke 4
A straightforward par 4 of 320m.
Accuracy off the tee is required as there are trees running along the entire left hand side and no drop zones.
If the second shot is not also accurate the ball feeds away left & right from the elevated green leaving a difficult recovery shot.
HOLE 16 (Par 4)
Roadway | 310 M | Stroke 6
A short par 4 with a slight dog-leg to the left. Trees run along most of the left hand side with a penalty area on the right hand side.
The green is narrow & guarded by two large pine trees at the front left hand side.
Accuracy from the tee is the key.
HOLE 17 (Par 3)
The Island | 124 M | Stroke 12
A downhill par 3 of only 124m.
Your tee shot is usually into the prevailing winds but even with no wind the tee shot is daunting.
With lateral penalty area left & right and water guarding the front of the green anything not accurate gets punished.
HOLE 18 (Par 4)
Waitakere | 392 M | Stroke 2
A longer par 4 of just under 400m (par 5 for the ladies). Accuracy off the tee is required as large pine trees guard the right hand side of the fairway.
Any tee shot not hit well leaves a long second shot to a green that has out of bounds behind it & to the right. Rated the second hardest hole on the course mainly due to it's length.
 Aim left side for the tee-shot as they feed to the right.


 Golf Carts are
  Golf Course is